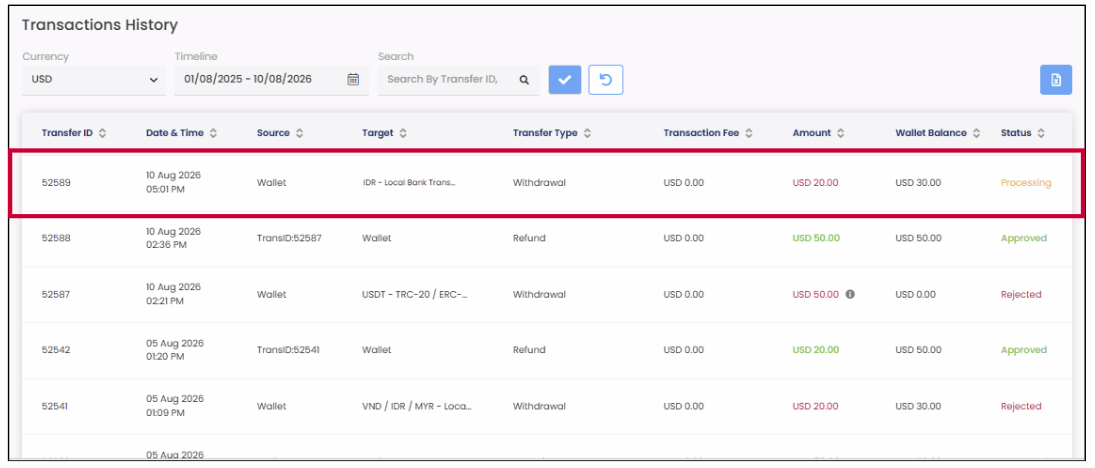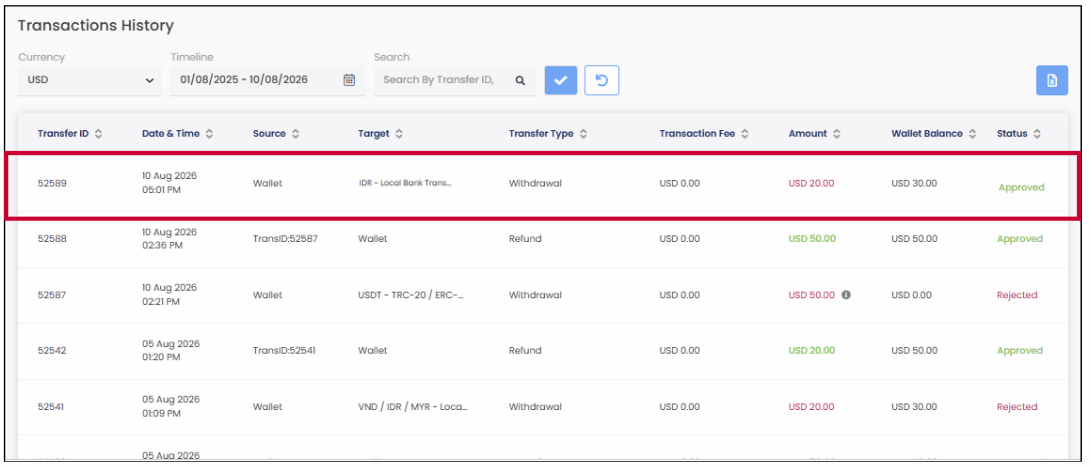
How to Withdraw IB Commission
https://ib.hiroseag.com
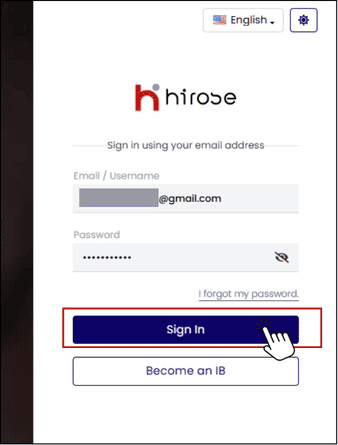
Once you have successfully logged in to the IB Portal, you will be taken to the Dashboard.
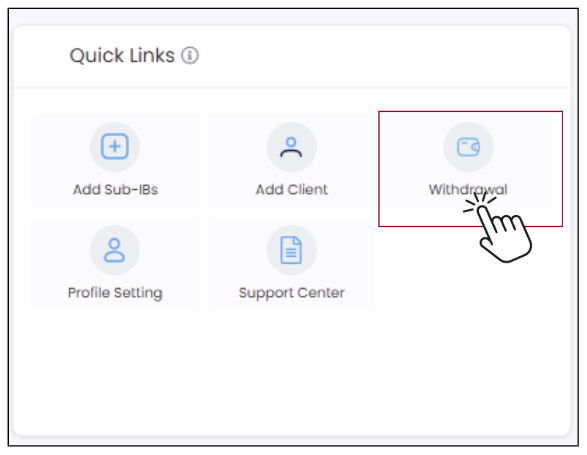
You can find Withdrawal feature in the Quick link section of the Dashboard.
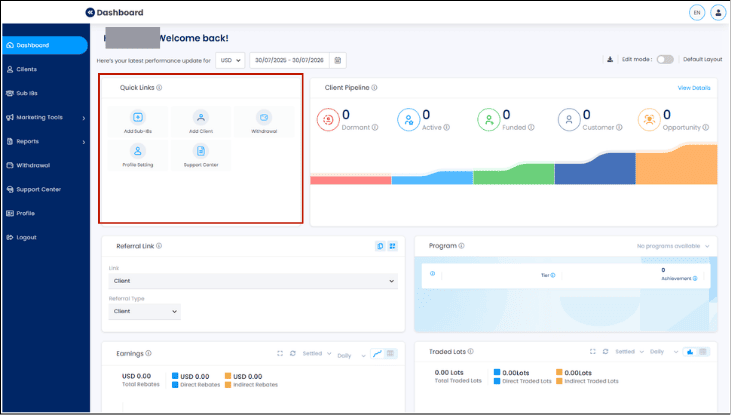
Step 3: Click [Withdrawal] to access Cash Wallet Page
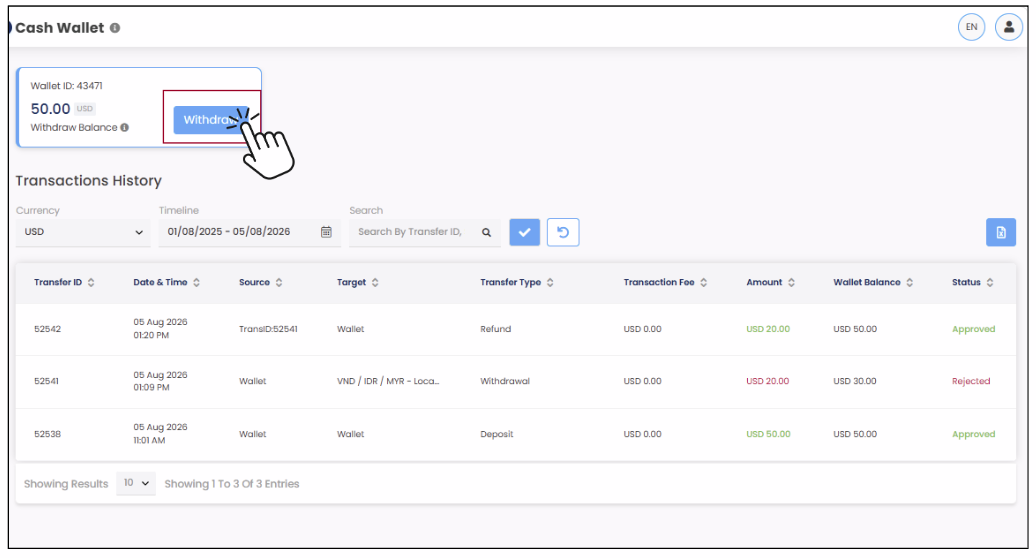
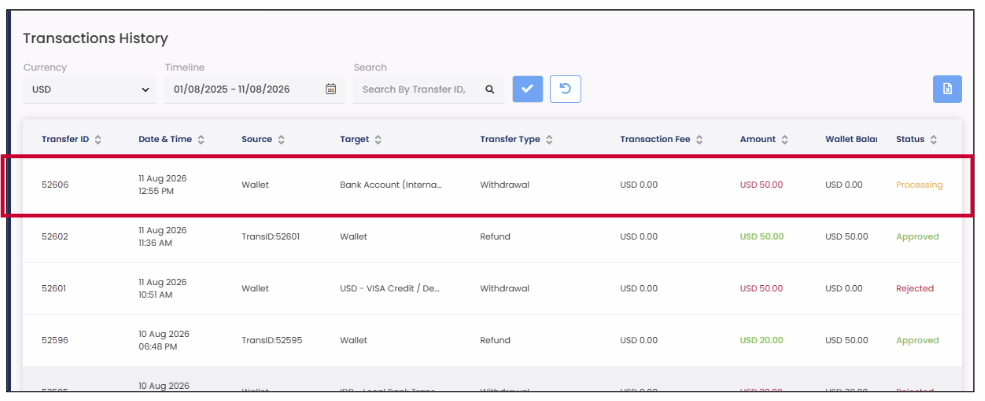
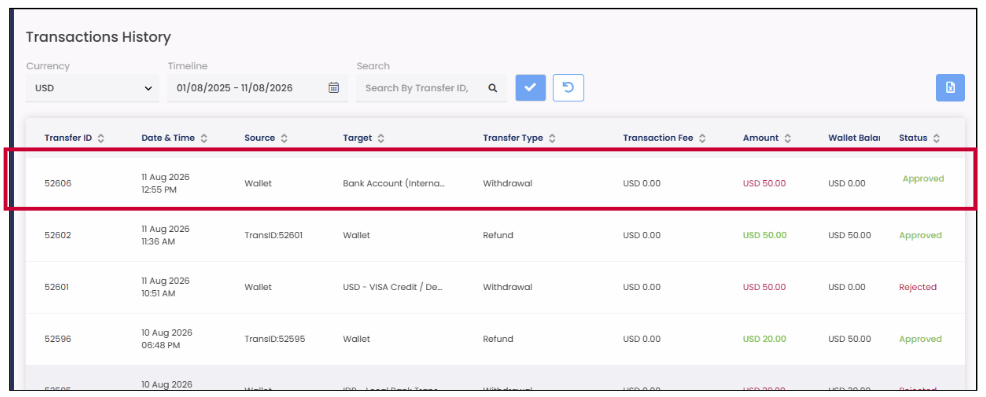
Step 4: You will be directed to Cash Wallet page. At this page, you can see your balance and transaction history.
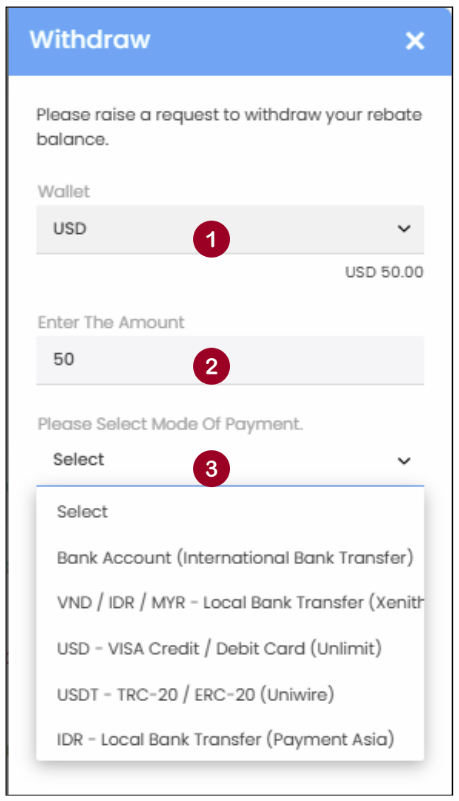
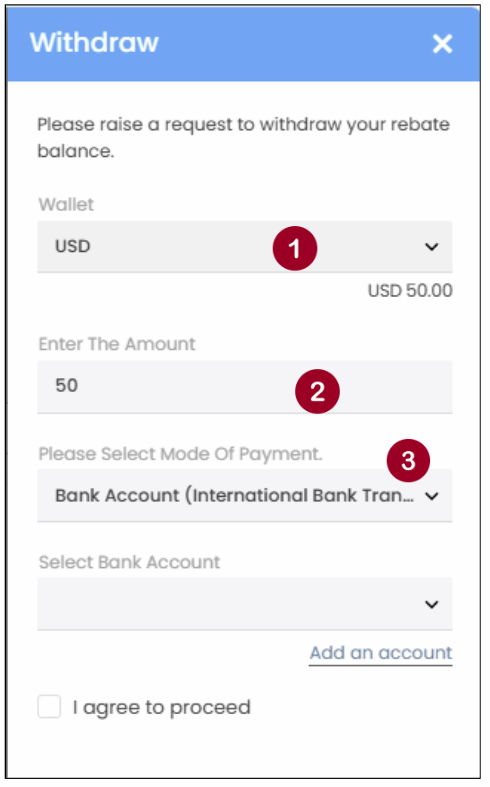
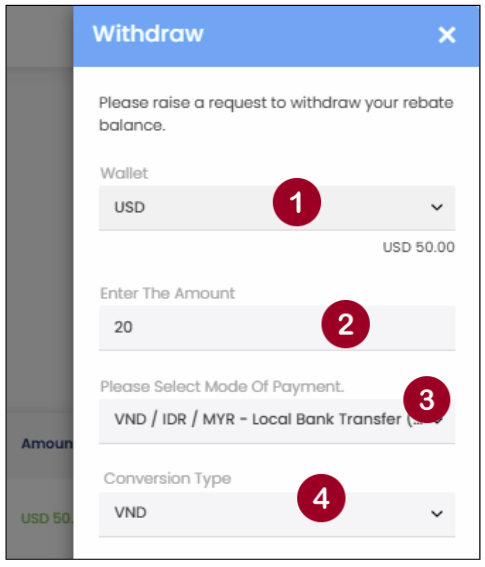
Step 5: The withdrawal window will slide in from the right side of the page. Complete the form to submit your withdrawal request.
1Select your Wallet
2Enter your withdrawal amount
3Seclect your Mode of Payment from the dropdown list
MODE OF PAYMENT
There are five payment methods available in the dropdown list.
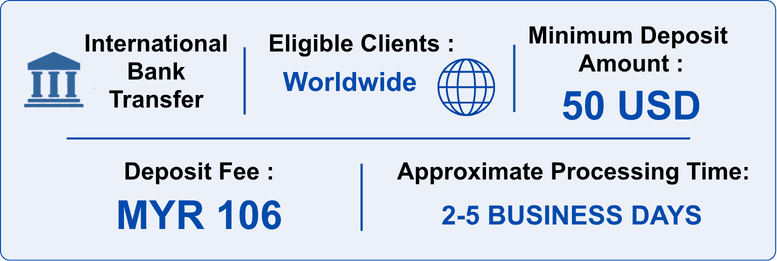
METHOD 1: Bank Account
(INTERNATional Bank Transfer)
- Wallet: Select USD
- Enter your withdrawal amount
- Select the Mode of Payment: Bank Account (International Bank Transfer)
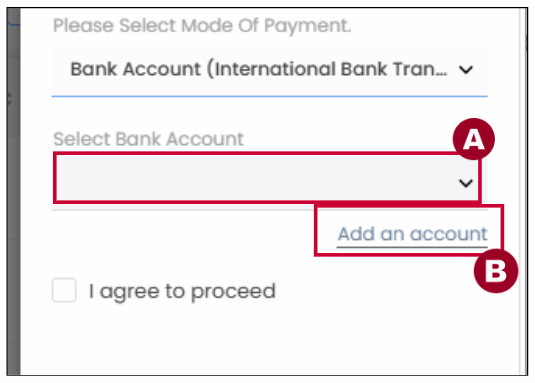
Step 2: The Sellect Bank Account field will appear in the form.
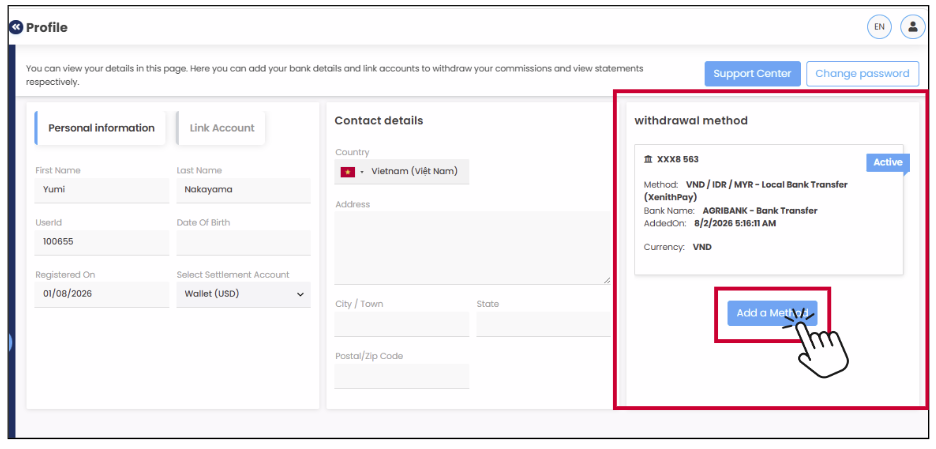
The Bank Details for Withdrawals panel will slide in from the right.
In the Payment Method field, select Bank Account (International Bank Transfer)
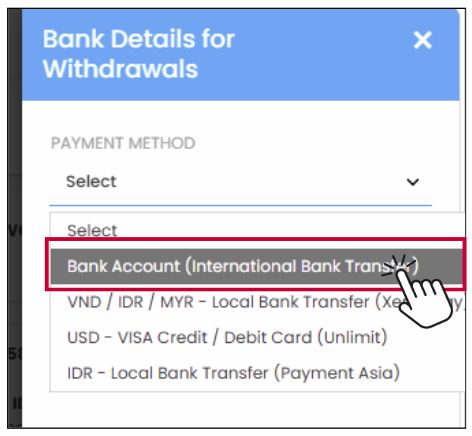
Step 5: Add your Bank Account (2)
Please fill in the required information to proceed with your withdrawal.
- Country: Select the country your bank account is opened in.
- Beneficiary Name: Enter your full name as it appears on your bank account.
- A/C Number/ BAN: Enter your account number.
- Currency: Select USD
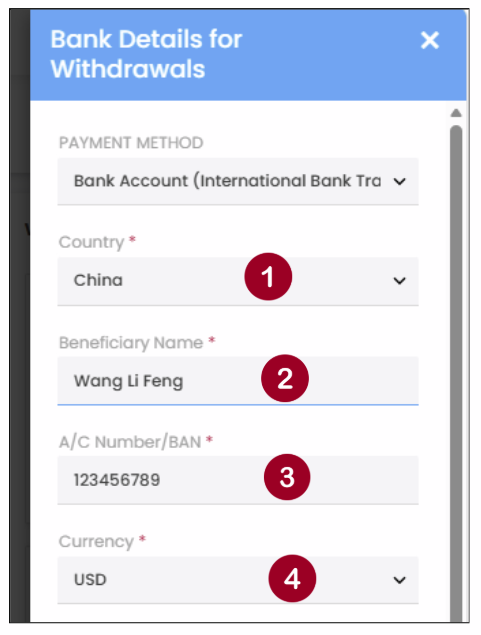
Step 6: Add your Bank Account (3)
Please fill in the required information to proceed with your withdrawal.
- Bank Name: Enter your bank name
- Swift Code/BSB: Enter the SWIFT code of your bank branch where you opened your bank account
- City: Enter the city where you currently reside.
- Street Address: Enter your detailed address
- Correspondent Bank: Enter the correspondent/intermediary bank details if required by your receiving bank. If no correspondent bank is required, leave this field blank.
- Attachment: Upload a bank statement or other proof of bank account ownership. The document must have been issued within the last 6 months.
- Tick the checkbox to confirm that all the information provided above is correct.
- Click the [Submit] button to add your bank account.
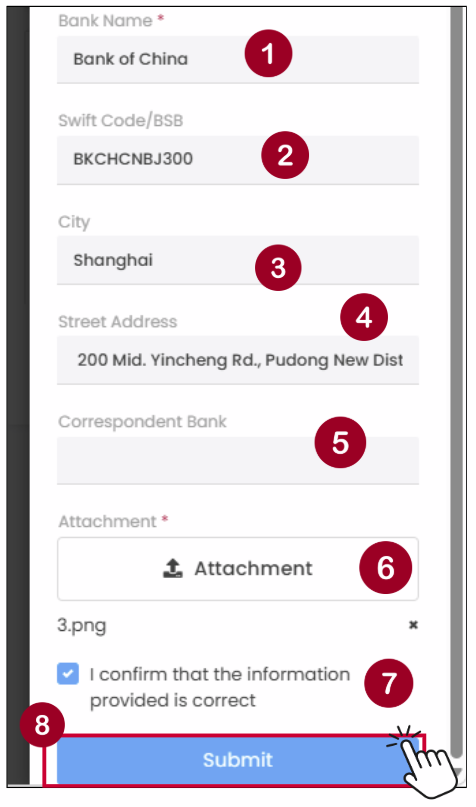
Note: Please ensure all bank account details are entered accurately to avoid delays or rejection of your withdrawal request.
Step 7: The bank account will be shown in the Withdrawal Method section with Under approval status
Please wait for the Hirose team to review and approve your bank account.
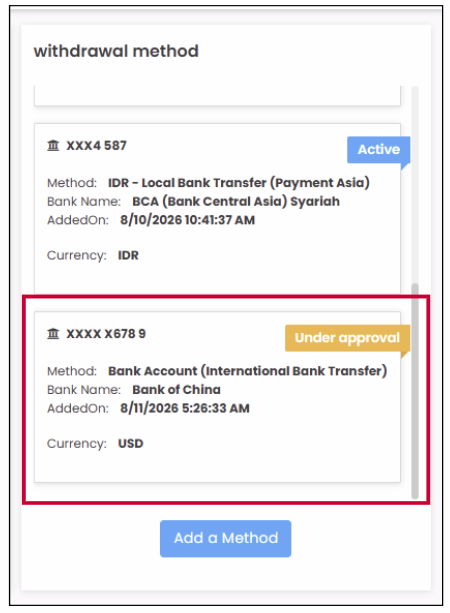
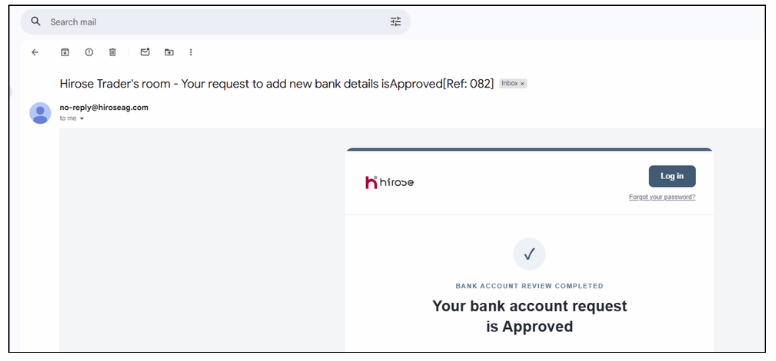
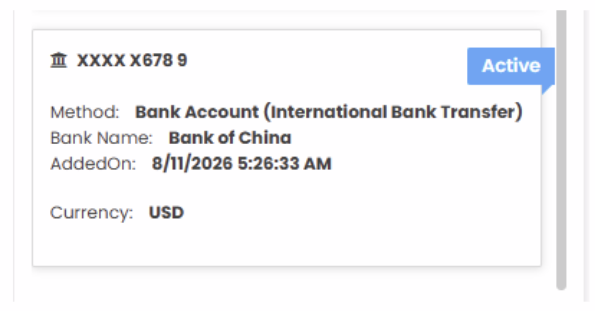
Your new Bank Account has been added to the dropdown list. Select your Bank Account to proceed to next step.
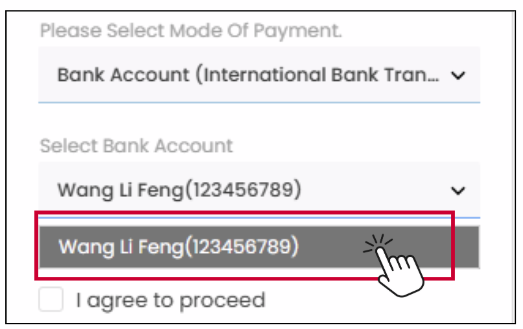
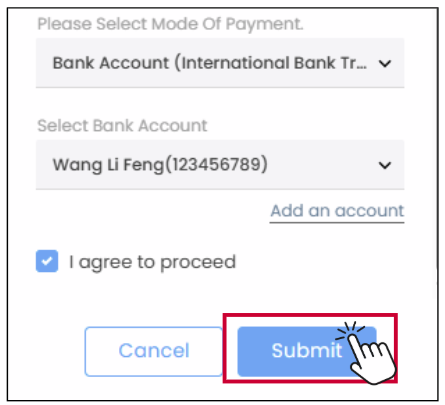
- Tick the box to “I agree to proceed”
- Click [Submit] button
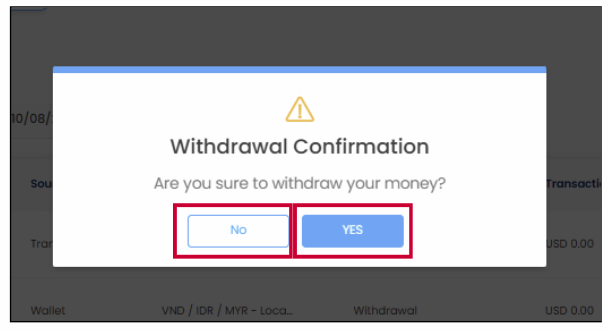
The Withdrawal Confirmation window will appear. Please review and confirm your withdrawal request.
- If you wish to proceed with the withdrawal, click the [YES] button.
- If you would like to make changes to your request or are not ready to proceed, click the [NO] button to return to Step 1.
METHOD 2: VND/IDR/MYR –
Local Bank Transfer (Xenith Pay)
- Wallet: Select USD
- Enter your withdrawal amount
- Select the Mode of Payment: VND/ IDR / MYR – Local Bank Transfer (XenithPay)
- Conversion Type: Select IDR or VND or MYR
Step 2: The Sellect Bank Account field will appear in the form.
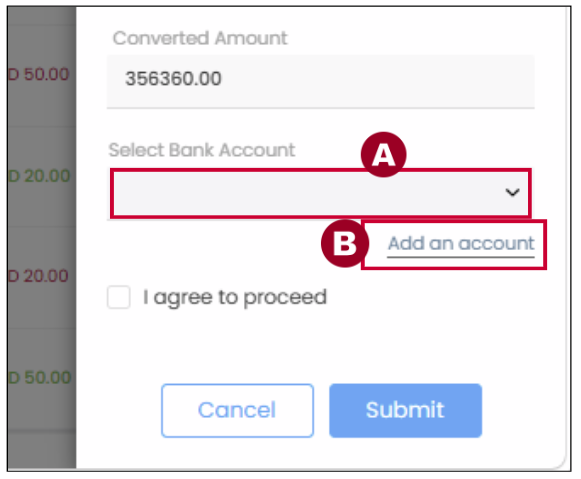
The Bank Details for Withdrawals panel will slide in from the right.
In the Payment Method field, select VND/ IDR / MYR – Local Bank Transfer (XenithPay)
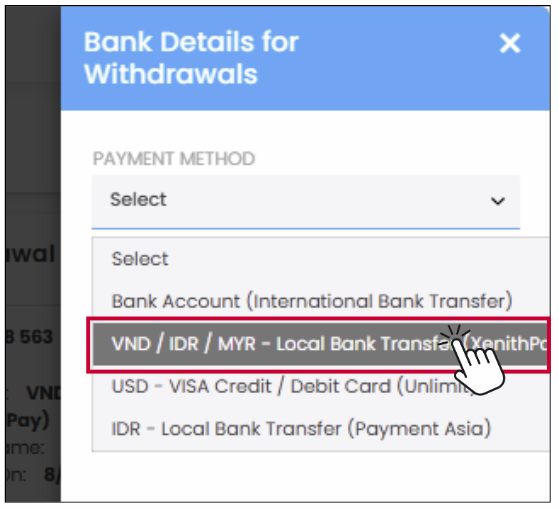
Step 5: Complete the required bank account information:
- Country: Select the country where your bank account is registered.
- Beneficiary Name: Enter the account holder’s full name. The name must match the name registered on your IB account.
- A/C Number / BAN: Enter your bank account number.
- Currency: Select the currency of your bank account:
- IDR – Indonesian Rupiah
- MYR – Malaysian Ringgit
- VND – Vietnamese Dong
- Bank Name: Select your bank name from the available list.
- Click the [Submit] button to add your bank account.
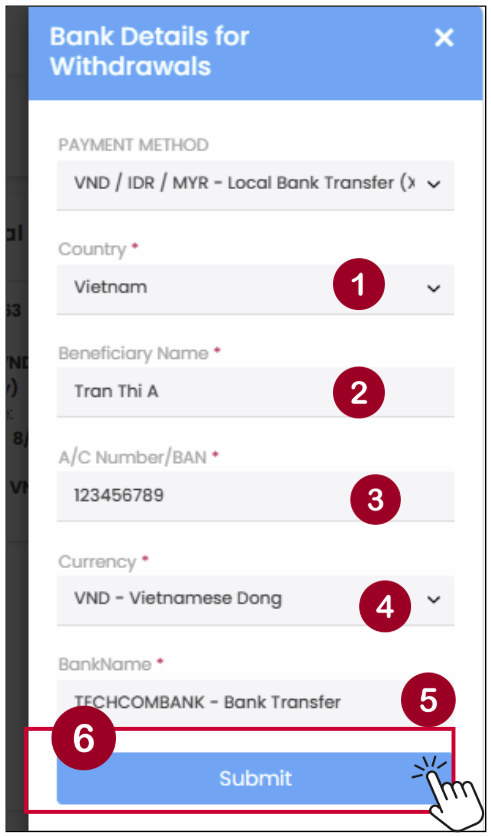
Note: Please ensure all bank account details are entered accurately to avoid delays or rejection of your withdrawal request.
Step 6: The bank account will be shown in the Withdrawal Method section with Under approval status
Please wait for the Hirose team to review and approve your bank account.
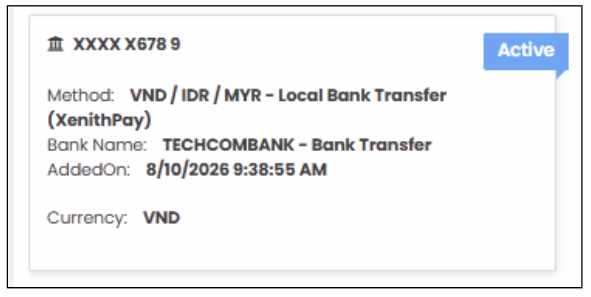
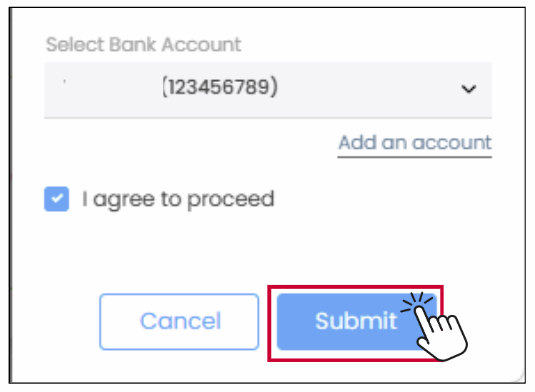
Your new Bank Account has been added to the dropdown list. Select your Bank Account to proceed to next step.
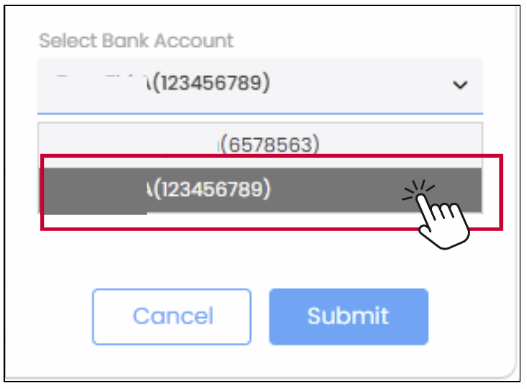
- Tick the box to “I agree to proceed”
- Click [Submit] button
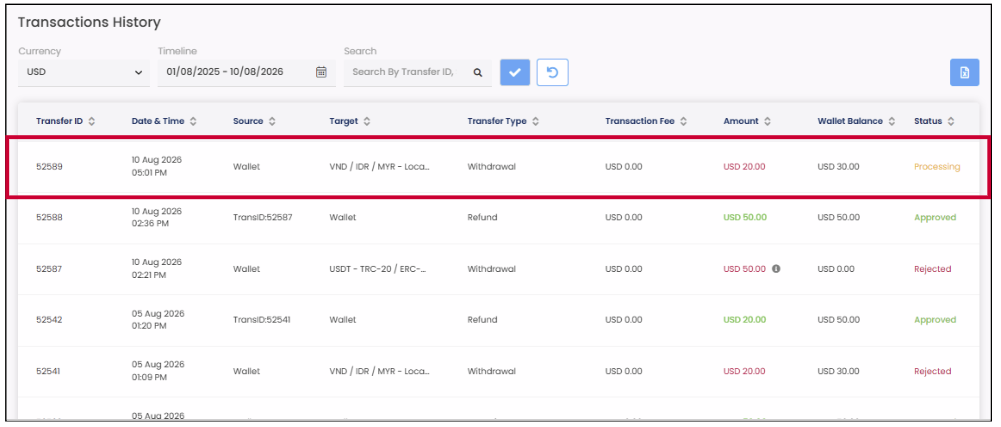
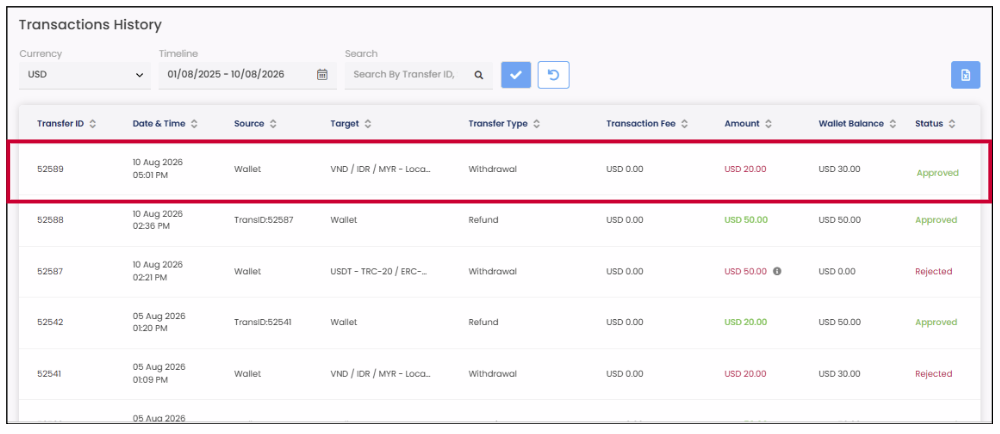
The Withdrawal Confirmation window will appear. Please review and confirm your withdrawal request.
- If you wish to proceed with the withdrawal, click the [YES] button.
- If you would like to make changes to your request or are not ready to proceed, click the [NO] button to return to Step 1.
METHOD 3: USD –
VISA Credit / Debit Card (Unlimit)
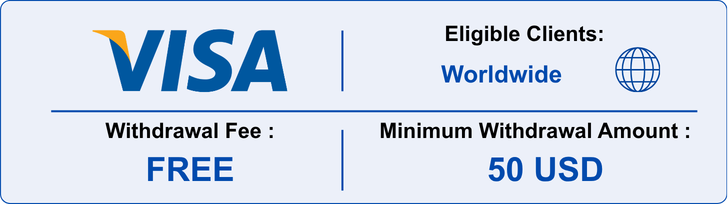
Part 1: Submit a Withdrawal Request
- Wallet: Select USD
- Enter your withdrawal amount
- Select the Mode of Payment: USD – VISA Credit / Debit Card (Unlimit)
- Conversion Type: Select USD
- Tick the box to “I agree to proceed”
- Click [Submit] button
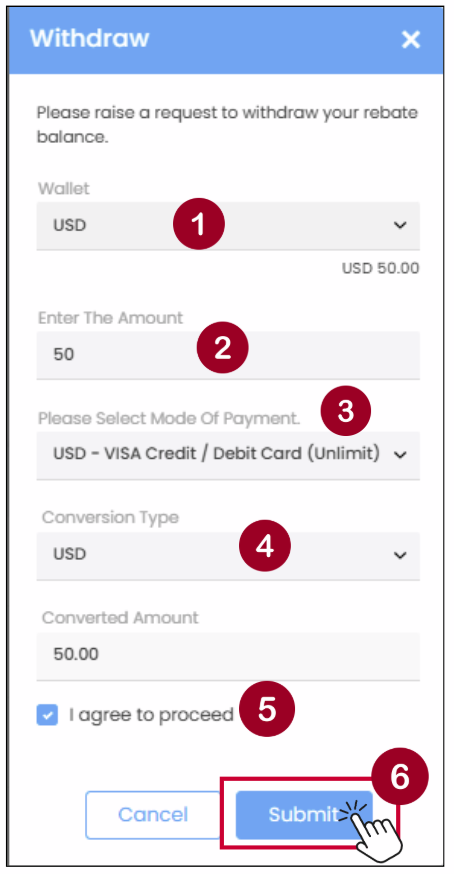
The Withdrawal Confirmation window will appear. Please review and confirm your withdrawal request.
- If you wish to proceed with the withdrawal, click the [YES] button.
- If you would like to make changes to your request or are not ready to proceed, click the [NO] button to return to Step 1.
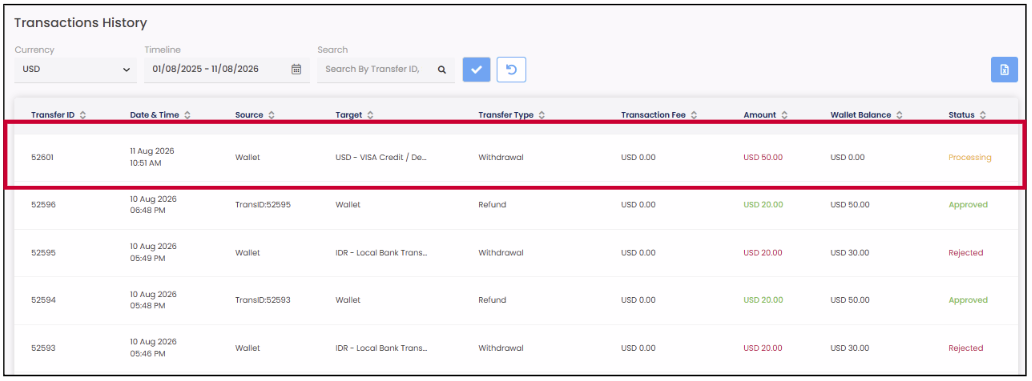
Part 2: Upload Supporting Documents
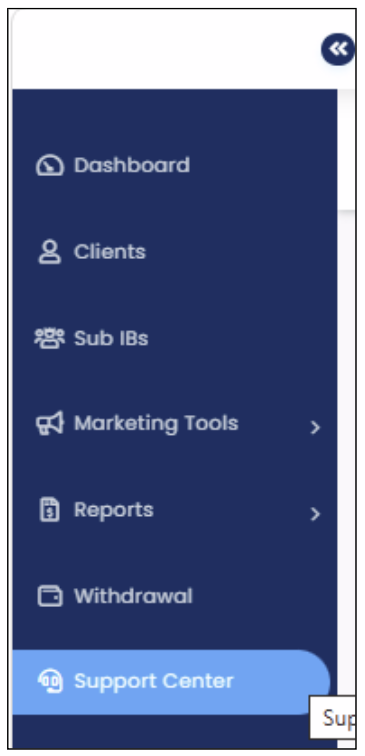
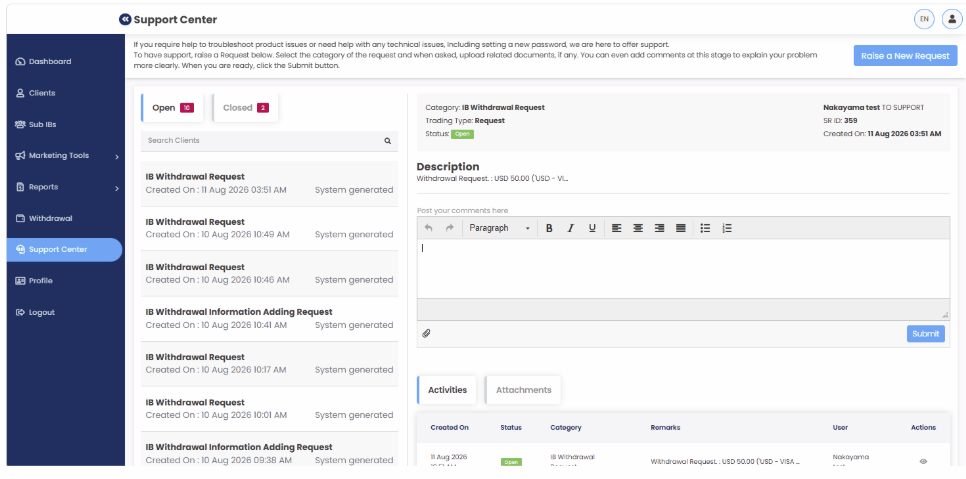
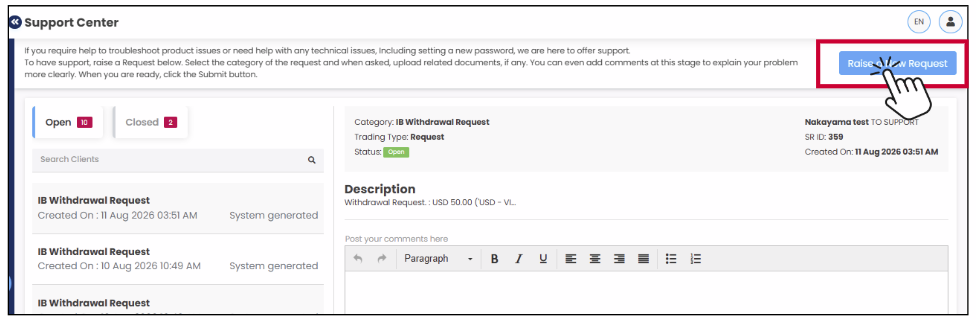
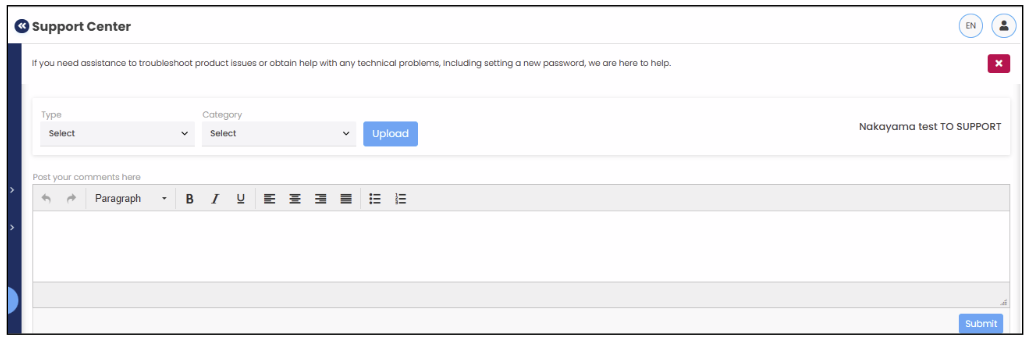
Step 4:
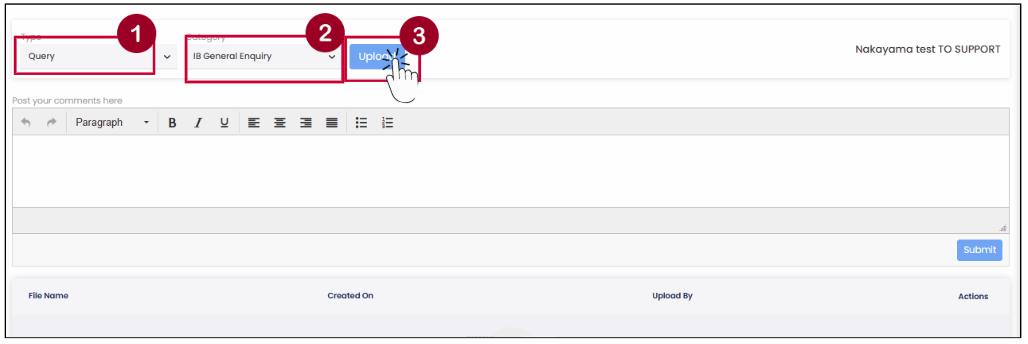
- Under Type, select Query.
- Under Category, select IB General Enquiry.
- Click [Upload] and upload clear images of the front and back of your VISA credit/debit card.
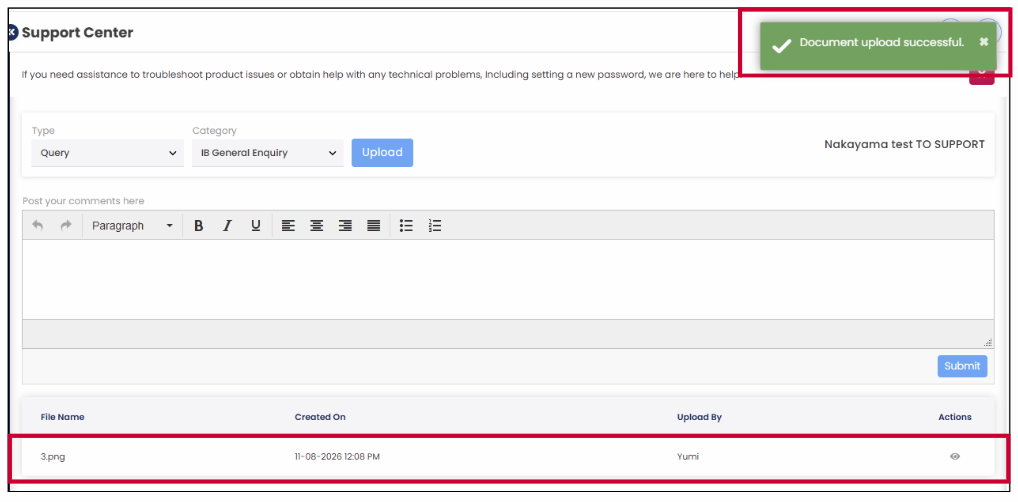
Once the upload is complete, a push notification will appear, and the document will be displayed in the Files section.
This field is optional. You may enter a brief description if needed.
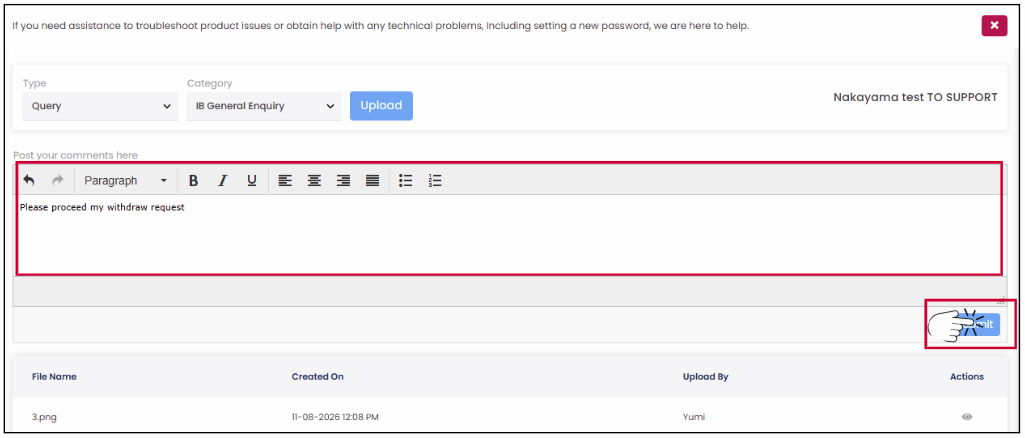
Click [Submit]
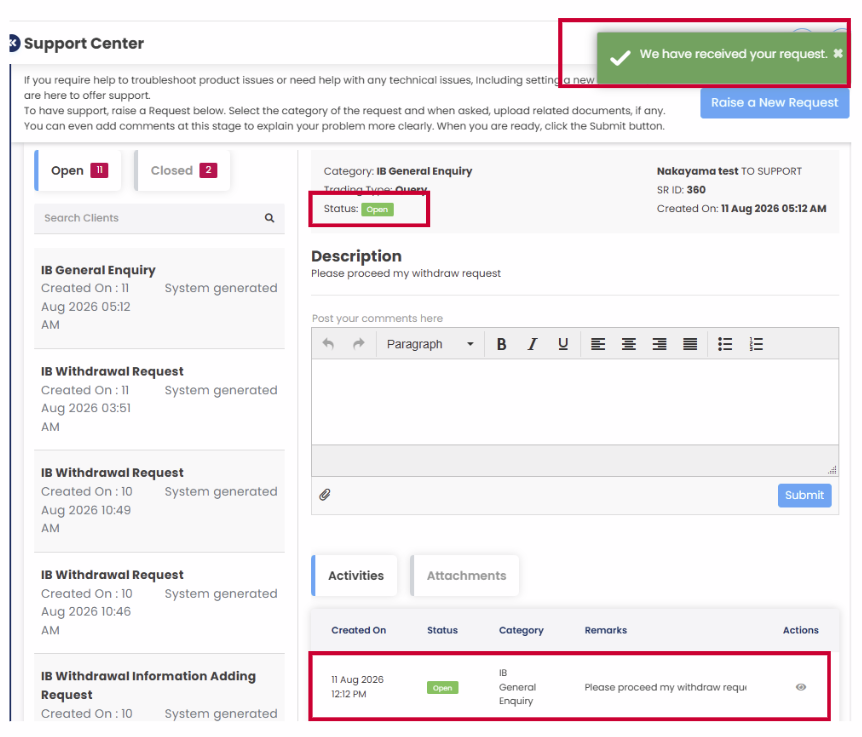
After submitting the request, a confirmation message will appear indicating that your request has been received successfully. You can view the submitted request and its status in the Support Centre section below.
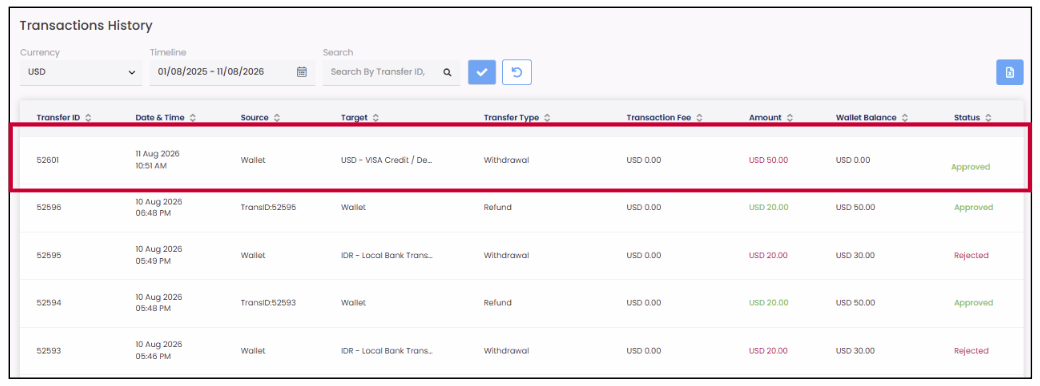
Note: Our team will review and process your request as soon as possible. Please check the Support Centre section for status updates.
METHOD 4: USDT –
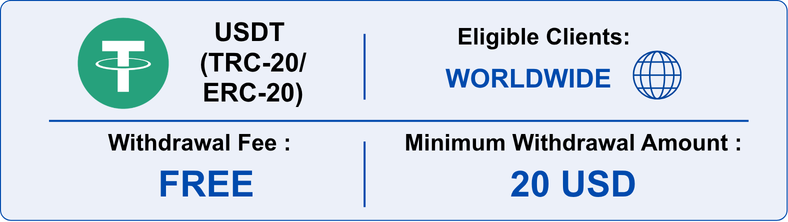
TRC-20/ ERC-20 (Uniwire)
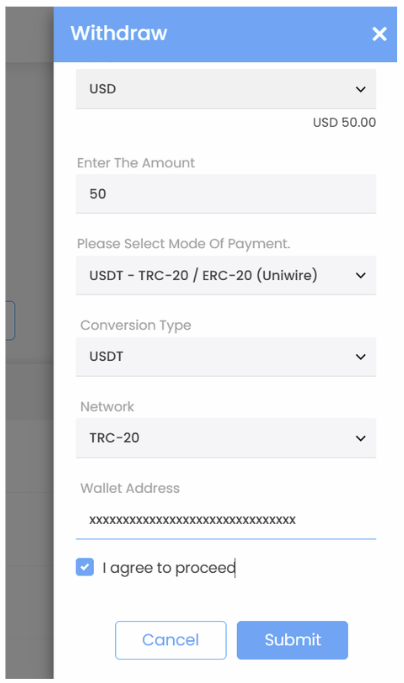
- Wallet: Select USD
- Enter your withdrawal amount
- Select the Mode of Payment: USDT (TRC-20/ERC-20)
- Conversion Type: Select USD
- Network: Select TRC-20 or ERC-20, depending on your crypto wallet type.
- Wallet Address: Enter your Wallet Address, make sure it is correct
- Tick the box to “I agree to proceed”
- Click [Submit] button
Important: The wallet address you provide must belong to you. Any withdrawal request submitted using a different wallet address may require additional verification and may be declined if ownership of the wallet address cannot be verified.
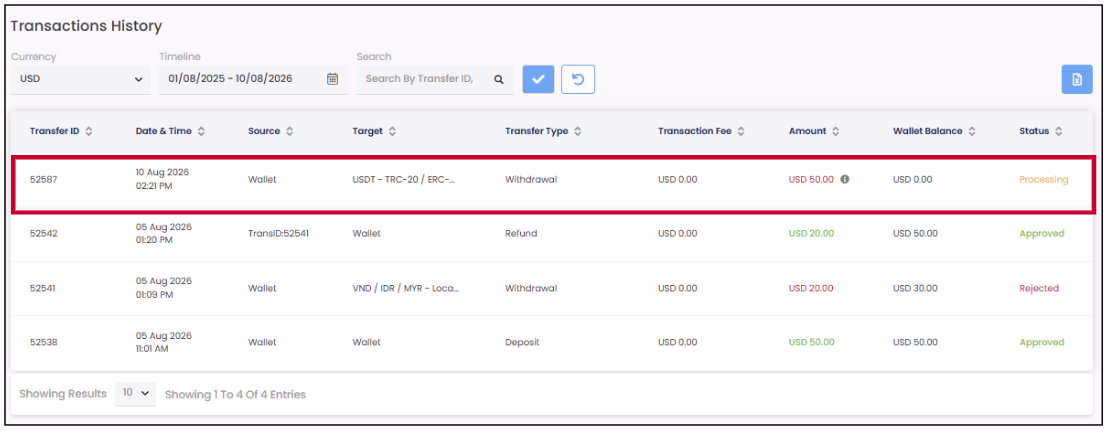
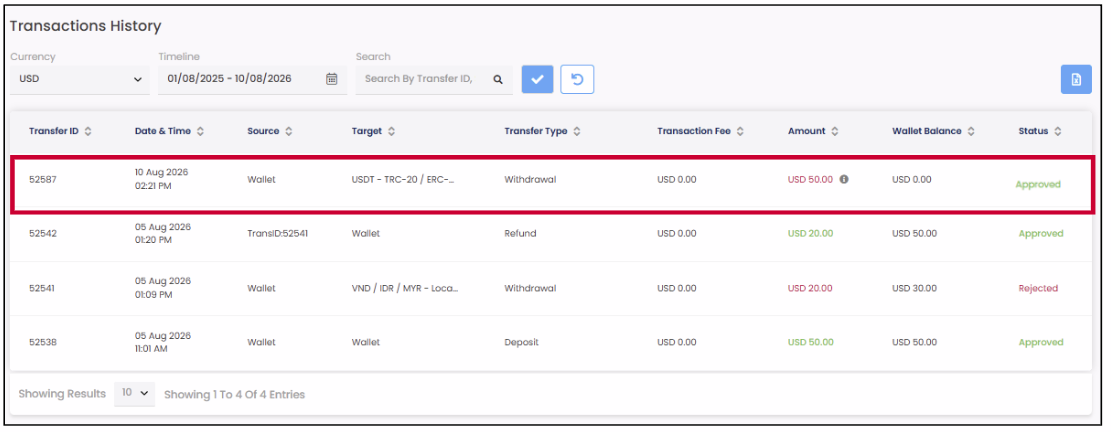
The Withdrawal Confirmation window will appear. Please review and confirm your withdrawal request.
- If you wish to proceed with the withdrawal, click the [YES] button.
- If you would like to make changes to your request or are not ready to proceed, click the [NO] button to return to Step 1.
METHOD 5: IDR – Local Bank Transfer (Payment Asia)
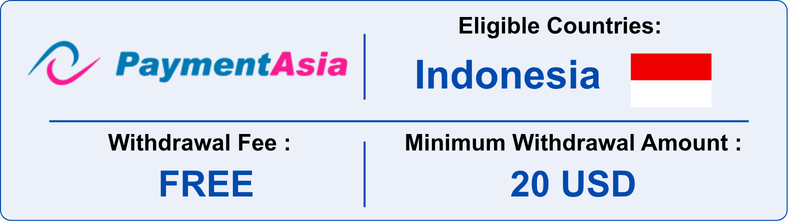
- Wallet: Select USD
- Enter your withdrawal amount
- Select the Mode of Payment: IDR-Local Bank Transfer (Payment Asia)
- Conversion Type: Select IDR
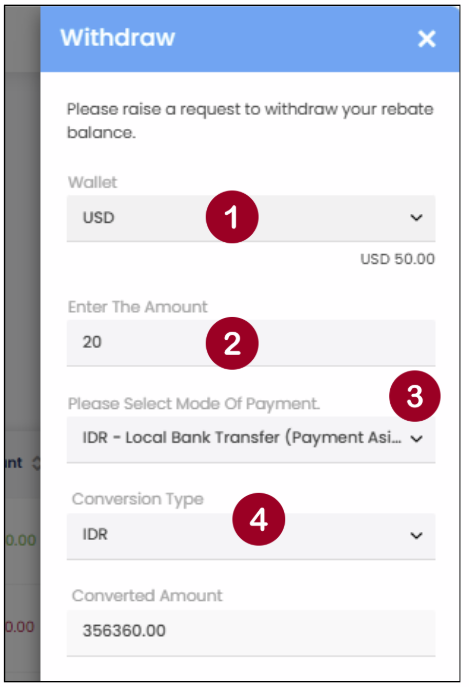
Step 2: The Sellect Bank Account field will appear in the form.
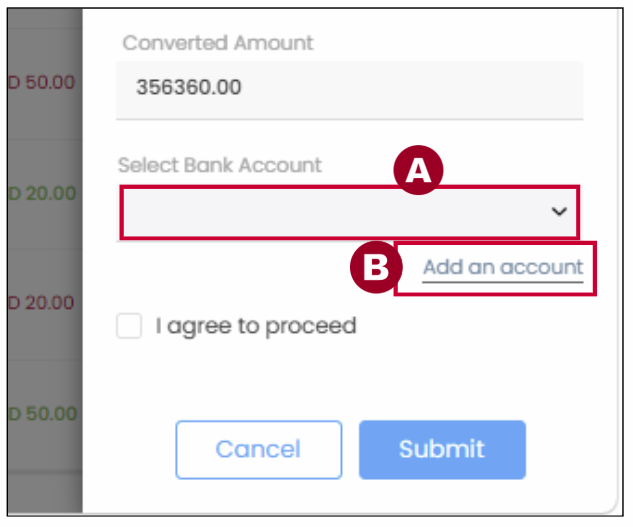
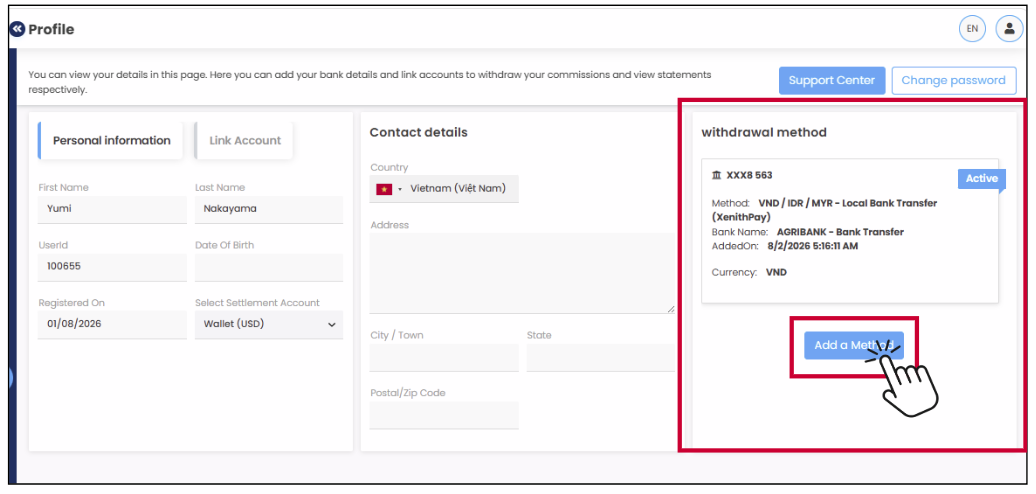
Step 4: Add your Bank Account
The Bank Details for Withdrawals panel will slide in from the right.
In the Payment Method field, select IDR-Local Bank Transfer (Payment Asia)
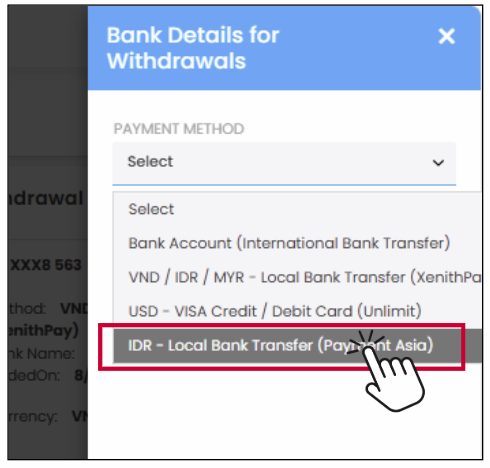
Step 5: Add your Bank Account (2)
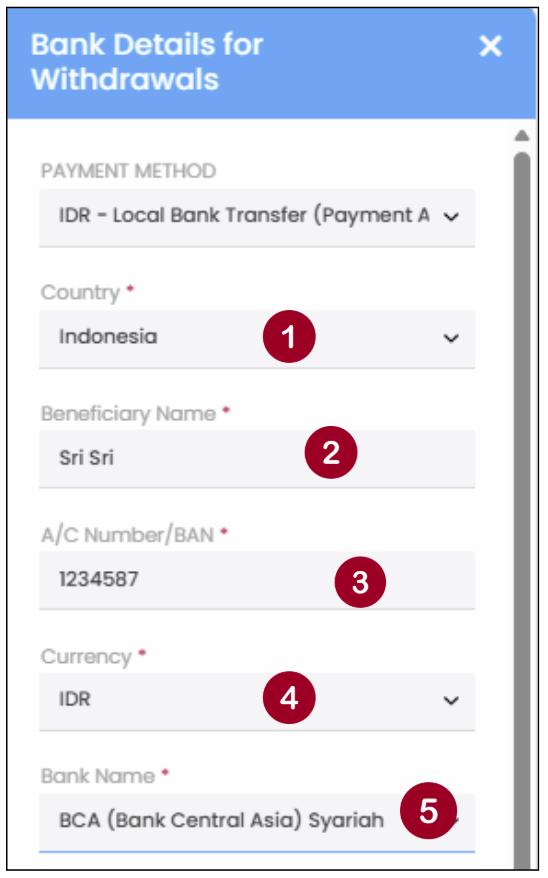
Please fill in the required information to proceed with your withdrawal.
- Country: Select Indonesia
- Beneficiary Name: Enter your full name as it appears on your bank account.
- A/C Number/ BAN: Input your Account Number
- Currency: Select IDR
- Bank Name: Please select your bank name from the dropdown list
Step 6: Add your Bank Account (3)
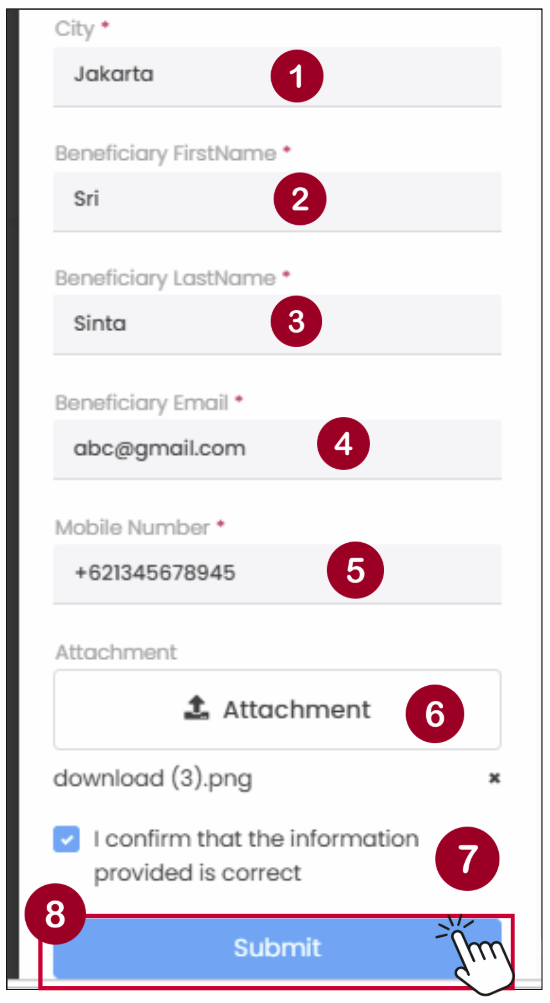
Please fill in the required information to proceed with your withdrawal.
- City: Enter the city where you currently reside.
- Beneficiary First Name: Enter your first name.
- Beneficiary Last Name: Enter your last name (family name).
- Beneficiary Email: Enter your email address.
- Mobile Number: Enter your mobile number
- Attachment: Upload a bank statement or other proof of bank account ownership. The document must have been issued within the last 6 months.
- Tick the checkbox to confirm that all the information provided above is correct.
- Click the [Submit] button to add your bank account.
Note: Please ensure all bank account details are entered accurately to avoid delays or rejection of your withdrawal request.
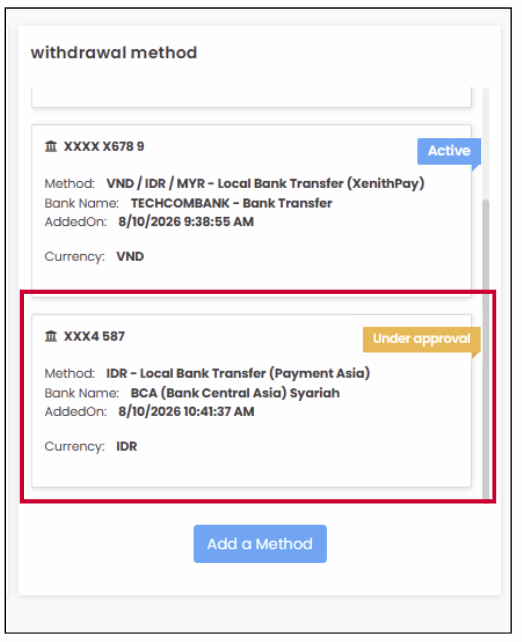
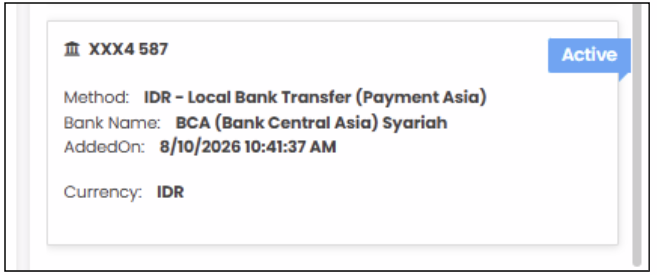
Step 7: The bank account will be shown in the Withdrawal Method section with Under approval status
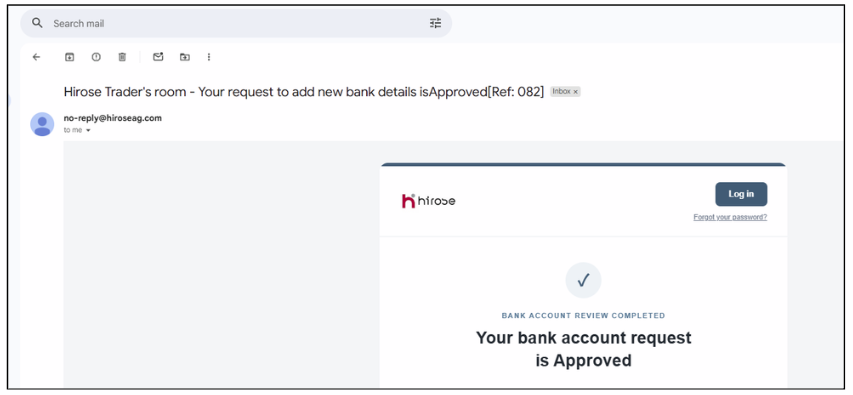
Please wait for the Hirose team to review and approve your bank account.
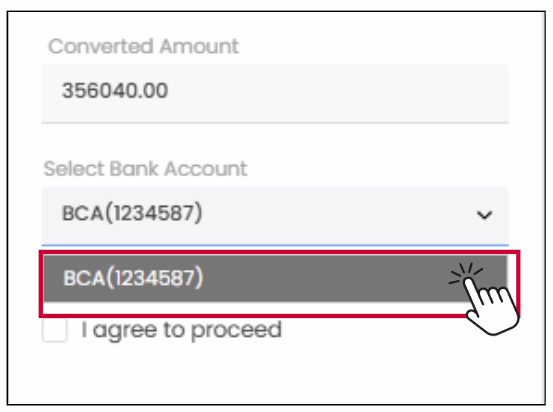
- Tick the box to “I agree to proceed”
- Click [Submit] button
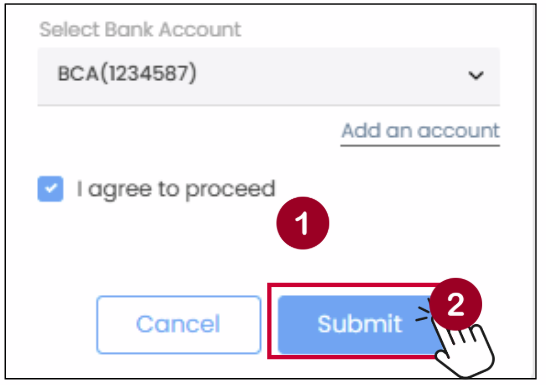
The Withdrawal Confirmation window will appear. Please review and confirm your withdrawal request.
- If you wish to proceed with the withdrawal, click the [YES] button.
- If you would like to make changes to your request or are not ready to proceed, click the [NO] button to return to Step 1.